Home
About VSI
What We Do
Who We Are
Contact Info
Resources
Blog
Data Archives Export
Tower Construction
Foundation Concrete Placement
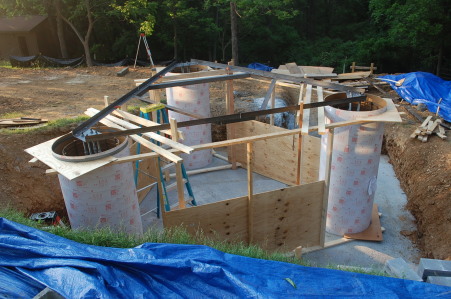
Mat
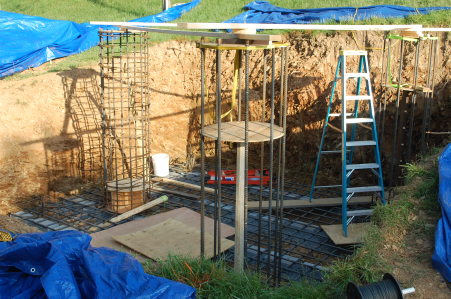
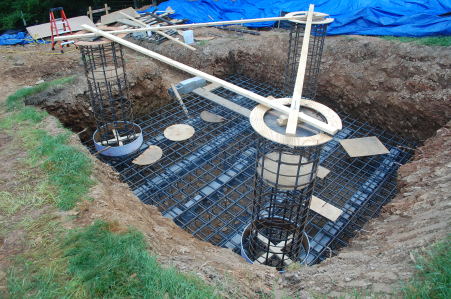

The mat was poured first. Note the three Sonotube rings suspended at the bottom of the piers, just where the bottom edge of the full Sonotube forms would go. That was to create a circular indentation in the mat concrete. The bottom edge of the Sonotube rings was built up with several layers of duct tape, to be sure the full pieces of Sonotube would fit. After the mat was poured the remaining rebar rings were installed on the pier cages and sonotube dropped over the rebar cages. Each Sonotube form weighed over a hundred pounds and was over seven feet tall, so placing them over the rebar cages was easier said than done. Fortunately I had my brother and two neighbors to help. That would have been an interesting exercise with only two people.
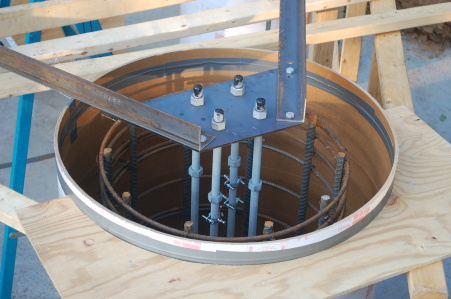
Anchor Bolts and Template
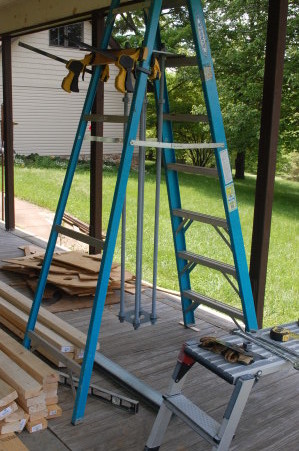
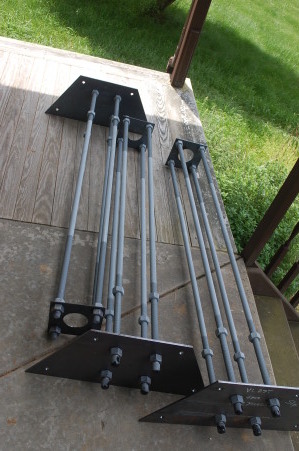 Next the anchor bolt assemblies were assembled. Each assembly consists of four anchor bolts, held top and bottom by metal
plates. The complete assembly was rather heavy so a little ingenuity with a stepladder was necessary to bolt
them together straight and true.
Next the anchor bolt assemblies were assembled. Each assembly consists of four anchor bolts, held top and bottom by metal
plates. The complete assembly was rather heavy so a little ingenuity with a stepladder was necessary to bolt
them together straight and true.
The tolerance on the placement of the anchor bolts was very tight; only 1/8". It would be a major disappointment to assemble the tower on the ground, pay to have a crane and tower climbing crew on hand, only to discover that the tower base wouldn't bolt to the foundation anchor bolts. To minimize that risk I purchased the optional anchor bolt template from the tower manufacturer. That template consists of a giant triangle that holds each anchor bolt assembly in the proper location. The template weights several hundred pounds, so we built a temporary scaffold out of 2x4 lumber and plywood.
Pouring the Piers
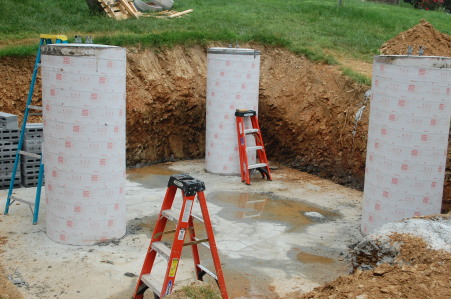 After all that work building the scaffolding and assembling the template, the pouring of the concrete in the
piers was uneventful. I asked the concrete supplier, TBH, for my favorite driver (also named Steve), as he
was the only one of several concrete truck drivers I asked who had any confidence in being able to pour from
the truck chute directly into the pier forms, with the necessity of building a chute out of lumber and plywood.
Steve obviously knew what he was doing. He backup his truck up to each pier to exactly the right place
on the first try each time. To reach the most inacessible pier, the easter one on the far side of the foundation,
he had the outermost tire on his rear axle axle hanging over the edge of the excavation. Thanks, Steve, you saved
me a lot of work.
After all that work building the scaffolding and assembling the template, the pouring of the concrete in the
piers was uneventful. I asked the concrete supplier, TBH, for my favorite driver (also named Steve), as he
was the only one of several concrete truck drivers I asked who had any confidence in being able to pour from
the truck chute directly into the pier forms, with the necessity of building a chute out of lumber and plywood.
Steve obviously knew what he was doing. He backup his truck up to each pier to exactly the right place
on the first try each time. To reach the most inacessible pier, the easter one on the far side of the foundation,
he had the outermost tire on his rear axle axle hanging over the edge of the excavation. Thanks, Steve, you saved
me a lot of work.
After a couple of days to make sure the concrete set up properly I disassembled and removed the template and stripped the scaffolding.
|
This site Copyright © 2002-2016 VSI. |